


How To Tighten the Berkey Spigot


Parts and Pieces of the Spigot
- Spigot
- Hex Nut
- Two Silicon Washers
How to Steps
- Remove all washers and the hex nut from your spigot.
- Install the white washer with the beveled edge towards the stainless steel container
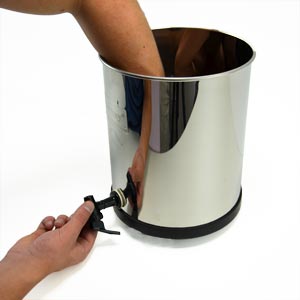
- Insert the threaded nipple into the hole in the bottom of the lower chamber of the Berkey
- Put one washer over the threaded part of the spigot on the outside of the lower chamber and the other on on the interior.
- Position the spigot upside down with the outlet facing up
- Hand tighten the hex nut until tight (do not use tools)
- While holding the nut from spinning, turn the spigot clockwise to the upright position.
- Position after turning spigot.
- The Sight Glass spigot is now tight and ready use!
Instruction Manuals
PDF manuals for all of the Berkey Essentials.

